Supporting Dental Models That Cannot Be Printed Flat
Resin 3D printing has quickly become a standard tool in dental laboratories, supporting the production of appliances such as surgical guides, splints, and night-guards. While the technology offers exceptional accuracy and repeatability, technicians often face the challenge of how to correctly orient and supporting models that cannot be printed flat on the build plate. These are functional dental appliances, not study models or demonstration pieces. Their organic geometry, combination of thin and thick sections, and critical fitting areas mean they demand a precise approach to achieve the best results.
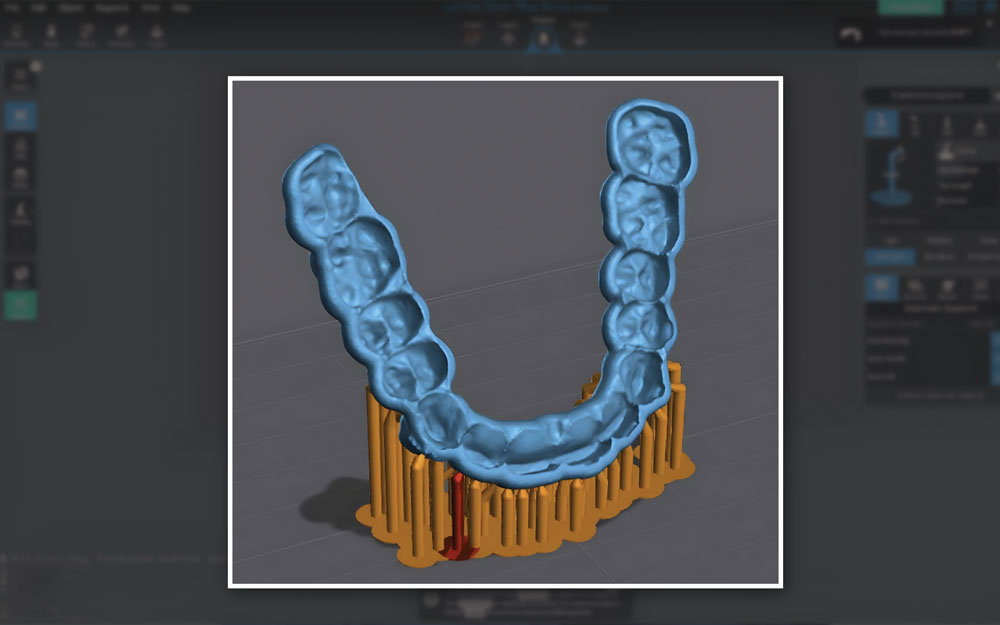
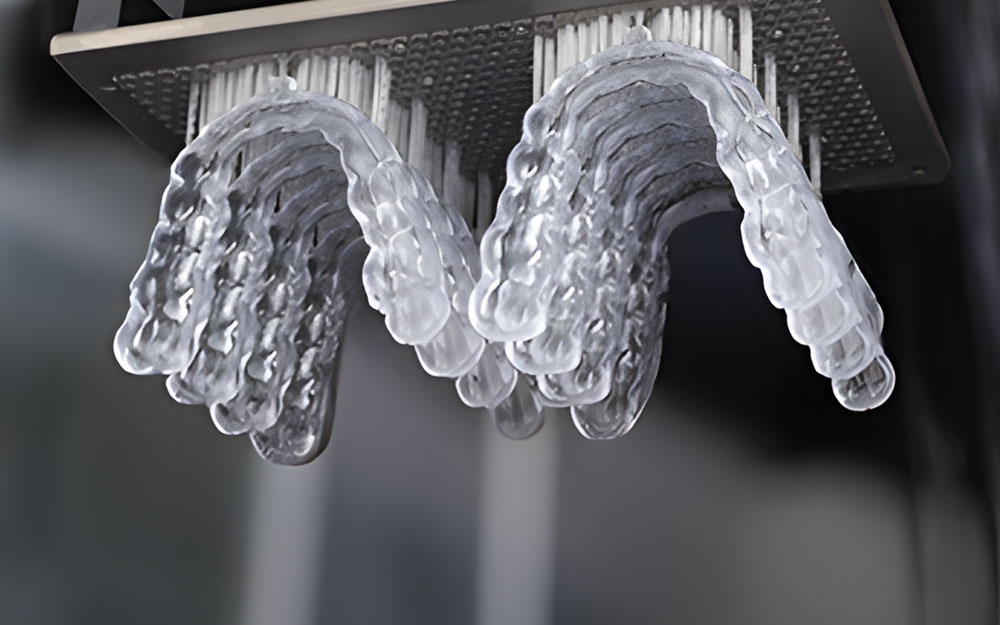
Printing directly on the build plate is not a practical option, as these appliances rarely feature flat surfaces suitable for that method. Without a flat surface, there is not enough area on the model to achieve proper adhesion to the build plate. This makes the use of supports essential, along with careful positioning of the model to ensure consistent and successful results.
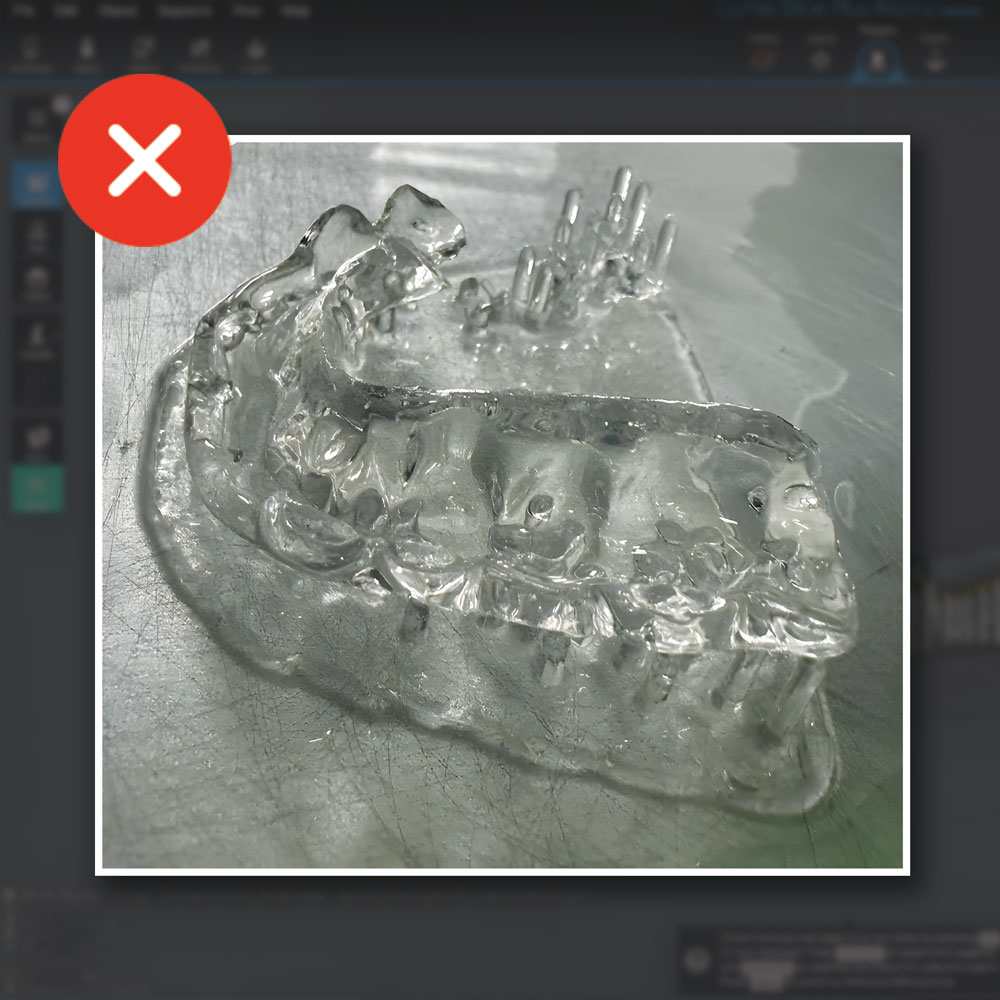
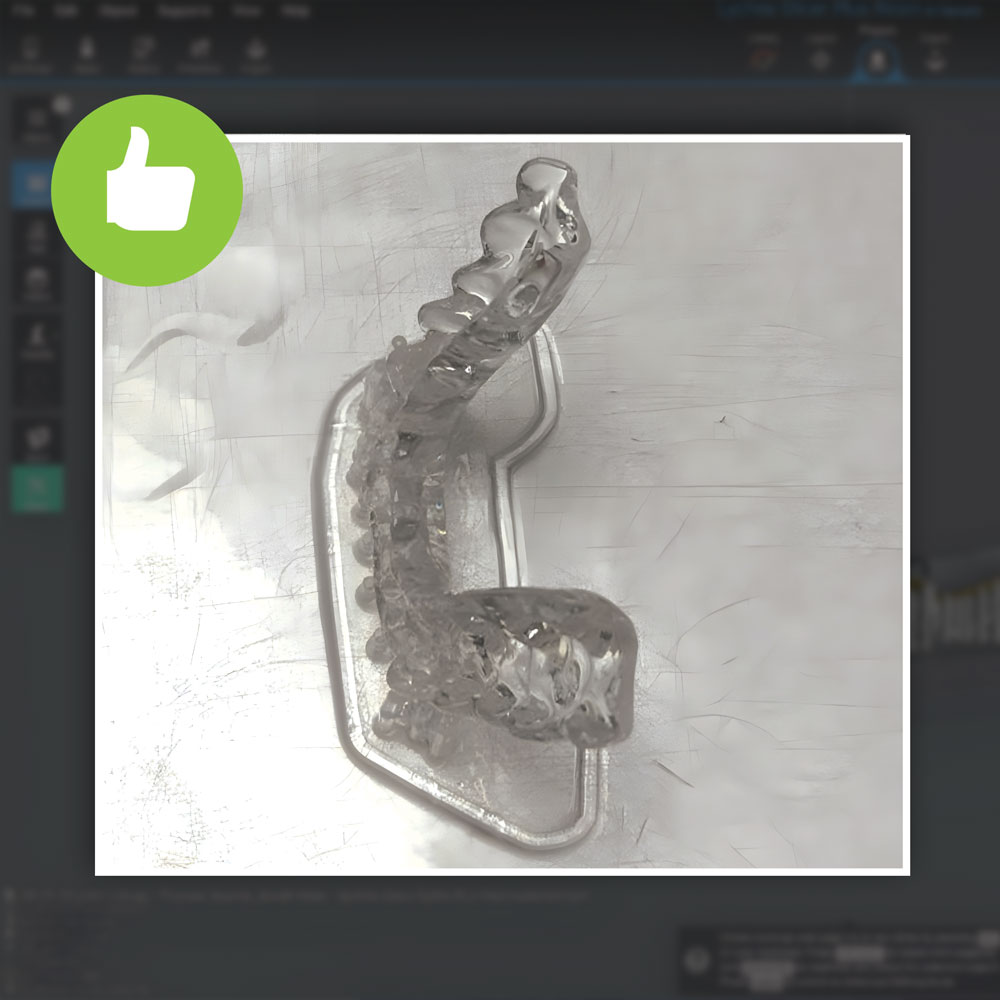
The reason angled printing is required is that when supports are used, they can sometimes create issues with dimensional accuracy due to the peeling forces inherent in top-down printing systems. Certain resins, particularly high-performance urethanes such as those used in our SPLINT resin, have a stronger tendency to adhere to the FEP release film. This can lead to complications, including supports being ripped away mid-build, distortion, or loss of accuracy. The most effective solution is to angle the print. By tilting the model between thirty and seventy degrees from the build plate, resin drains more effectively and the forces on each layer are reduced. This gradual build process promotes greater dimensional stability, smoother separation, and more predictable results. For appliances such as splints or surgical guides, where even a fraction of a millimetre can determine the clinical outcome, angled printing is essential.
Orientation is only the first part of the process. Equally critical is the design and strength of the supports. Dental appliances are often heavier and more complex than other resin prints, particularly when produced in biocompatible materials such as Monocure3D’s TRY-IN, GUIDE, or TRAY resins. To hold these models securely throughout the build, medium to heavy supports with a dense distribution are recommended. Supports must be strong enough to prevent movement, with contact points large enough to stay locked in place, yet not so large that they damage the surface during removal. For broader areas, dense bracing helps stop flexing, while thicker pillar supports provide stability for heavy occlusal or structural zones.
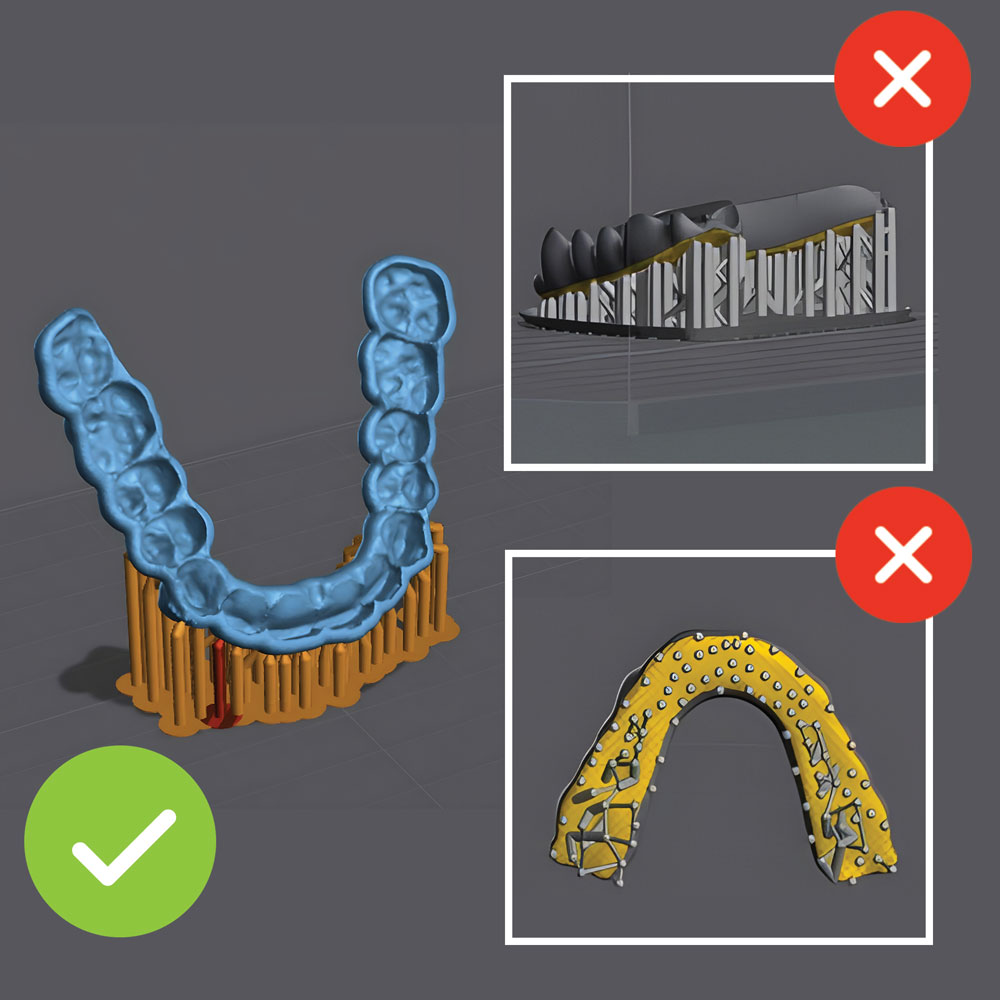
Protecting critical surfaces is another key consideration. The fitting surface of a splint or the guide sleeve of a surgical template should not be compromised. Support placement in these areas should be avoided wherever possible. If it is absolutely necessary, the smallest contact points should be used, and careful finishing is required to ensure geometry is preserved. Striking the right balance between stability and protection sits at the heart of successful dental printing.
Before committing to a full production build, review the model carefully in the slicer. The layer preview can reveal unsupported islands or weak areas that need additional attention. Anti-aliasing and light smoothing settings can reduce visible stair-stepping on angled surfaces, while checking that all supports are anchored firmly to the build plate helps prevent mid-print failures. For especially intricate appliances, it may be worthwhile to run a smaller section test print first, rather than risk the cost of a failed full build.
At Monocure3D, technicians get more than resin. They get confidence in the workflow. Our dental resins are designed for consistency, reliability, and ease of use across current printers and slicing platforms. With biocompatible formulations such as TRY-IN, GUIDE, and TRAY, laboratories can achieve repeatable results with the reassurance that every batch is manufactured and quality tested in Australia.
Support matters as well. Our technical team works closely with laboratories and our reseller network to provide practical guidance on setup, orientation, and support strategies. For those new to supported dental printing, we share tested slicer profiles and presets to reduce trial and error. This level of service is backed by our national network of distributors, with availability through resellers in every Australian state. Local supply ensures fast delivery without the uncertainty of overseas shipping. This gives laboratories the confidence to plan production schedules around dependable access to materials.
With careful orientation and well-placed supports, even complex dental appliances can be printed cleanly and accurately. This reduces waste, minimises rework, and helps deliver consistent results for clinicians and patients. Combined with Australian-made dental resins, expert support, and national reseller coverage, laboratories can integrate resin 3D printing into their workflows with confidence.
Practical tips for printing dental appliances
- Check adhesion first. Without a flat base, adhesion depends on supports. Position the model carefully to maximise stability.
- Angle matters. Keep models between 30° and 70° to reduce peeling forces and improve resin flow. This is important with strong urethane-based resins such as SPLINT.
- Build strong supports. Use medium to heavy density, with thicker pillars under heavier zones. Check that contact points are secure but not oversized.
- Protect the fitting surface. Avoid supports on critical fitting areas whenever possible. If unavoidable, use the smallest tips and finish with care.
- Preview before printing. Review layers in your slicer and look for unsupported islands and weak points. Consider a partial test print for complex parts.
- Leverage local expertise. For slicer profiles, support strategies, and material selection, contact the Monocure3D technical team or your local reseller.