Chitubox Settings to Improve Your Print Quality
MSLA 3D printing is one of the most popular 3D printing technologies. It can create prototypes with very high quality, fine features (thin walls, sharp corners, etc.), and complex geometric shapes. Although this technology has many advantages, the 3D models may still be very rough if you are unfamiliar with slicing, printing skills, etc.
The quality of 3D printing depends heavily on the equipment, materials, and slicer. We can improve the quality of 3D printing by adjusting the following settings.
Layer Height (mm)
As the name implies, layer height is the exact height of each cured layer. Layer thickness affects the speed (printing time) and the quality of each print. The number of layers required to create an object determines the printing speed and, thus, the printing time required. The thinner the layer thickness, the longer it takes to make a 3D-printed object of a given height. Relatively, with a thinner layer height, you will increase the print quality, leading to a smoother surface and more detail visible in the Z-direction (height) of the model.

According to technological differences between 3D printers, they generate different layer heights, as some may generate lower layer heights than others. Layer Thickness is measured in fractions of a millimeter (mm), and are often given in microns(µm). Generally, the minimum layer height of MSLA 3D printers is 25 µm (0.025mm) layer height, and the max is 100 µm (0.1mm). You can adjust this setting in your slicing tool, like CHITUBOX, based on the actual situation of your MSLA 3D printer. If you do not know how to choose the right one, there’s a tried-and-true technique to start your trying with a layer height of 50 μm (0.05mm).

Exposure Time (s)
The print quality of each 3D resin is also affected by the light power and the curing or exposure time. Exposure Time is the time the light source exposes each layer during printing. Different MSLA 3D printers have different cure times for resins.
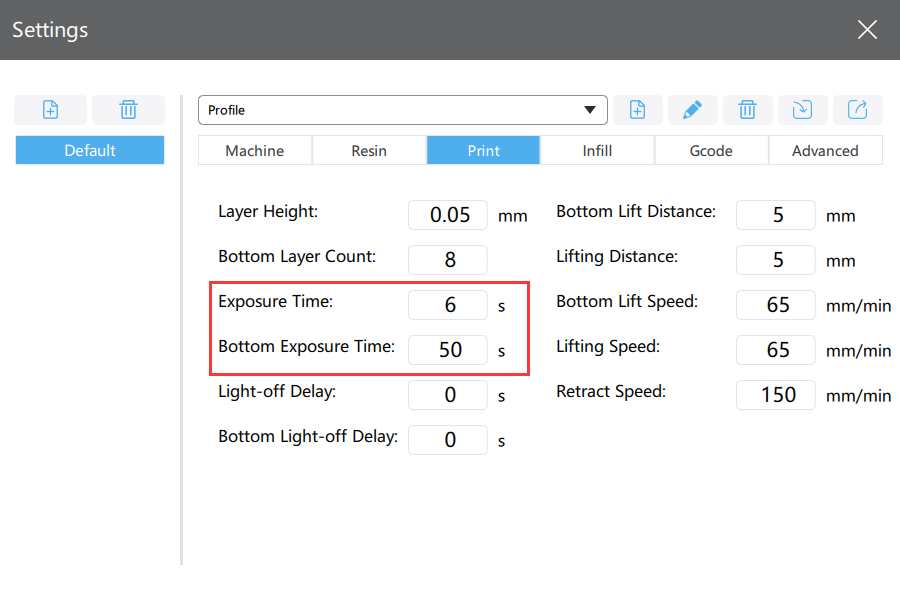
The default in CHITUBOX is 6 seconds. This exposure time is enough for most resins, and this setting can be modified based on actual situations.
As for bottom exposure time, it’s recommended to make it around 8-12 times longer than your normal layer cure time. The default bottom exposure time is 50 seconds in CHITUBOX. Increase the exposure time if the raft won’t stick to the build plate. Generally, the longer the bottom exposure time, the more tightly the raft will stick to the build plate.
Lift Speed (mm/min)
Lift speed refers to the speed at which the build plate is lifted from the resin vat between layers. If the lift speed is too fast, the model will be broken, and the support may also be damaged due to the tug-of-war between the build plate and the FEP film at the bottom of the vat. But if the speed is reduced too much, the printing time will be increased. The default lift speed is 65 mm/min in CHITUBOX. When modifying this setting, you should consider print quality and time.
Part Orientation
Orienting the part in different directions significantly affects the print quality. Sudden changes in the model structure from a small cross-section to a large cross-section area will lead to severe volumetric changes in layers, as the volume of 3D resin in each layer highly affects the shrinkage of each cured layer.

Sudden changes in the model structure affect model integrity and typically result in visible surface lines. Besides, part orientation impacts surface quality due to the process of slicing and printing the part in increments in the Z direction.
Anti-Aliasing
Aliasing is the staircase effect when diagonal or curved lines or borders are drawn on raster displays of square or rectangular pixels. Antialiasing blurs edge pixels, thereby smoothing the surface of printed objects.
CHITUBOX has a built-in anti-aliasing feature. After special algorithm processing, it makes the model smoother and more exquisite and effectively reduces edge aliasing.

Use Image Blur
CHITUBOX Image Blur function can provide a smoother surface effect on the printed parts’ surface details and dimensional accuracy.

